TensorFlowのCIFAR-10のチュートリアルを最後まで終えると、学習済みデータをテストデータで評価することができます。
その次の段階としては、実際に学習済みデータを使って、入力された画像の予測ラベルを出力できると実用的なものとなります。
入力画像に対する予測は、TensorFlowのチュートリアルにないので、評価部分の関数を改造して簡単に実装してみました。
もくじ
学習済みデータを用意する
チュートリアルに従って学習します。
Convolutional Neural Networks | TensorFlow
C:\>python cifar10_train.py
2017-04-30 17:22:40.654860: step 0, loss = 4.68 (5.6 examples/sec; 22.668 sec/batch)
2017-04-30 17:22:51.564441: step 10, loss = 4.62 (117.3 examples/sec; 1.091 sec/batch)
2017-04-30 17:23:13.666061: step 20, loss = 4.45 (57.9 examples/sec; 2.210 sec/batch)
2017-04-30 17:23:28.059816: step 30, loss = 4.37 (88.9 examples/sec; 1.439 sec/batch)
2017-04-30 17:23:46.472412: step 40, loss = 4.33 (69.5 examples/sec; 1.841 sec/batch)
2017-04-30 17:23:58.002931: step 50, loss = 4.31 (111.0 examples/sec; 1.153 sec/batch)
2017-04-30 17:24:12.224520: step 60, loss = 4.26 (90.0 examples/sec; 1.422 sec/batch)
2017-04-30 17:24:27.601215: step 70, loss = 4.10 (83.2 examples/sec; 1.538 sec/batch)
2017-04-30 17:24:38.973096: step 80, loss = 4.23 (112.6 examples/sec; 1.137 sec/batch)
2017-04-30 17:24:51.000095: step 90, loss = 4.32 (106.4 examples/sec; 1.203 sec/batch)
2017-04-30 17:25:03.198763: step 100, loss = 4.18 (104.9 examples/sec; 1.220 sec/batch)
だいたい2000stepくらい回してみました。
そのままの状態の実行すると、/tmp/cifar10_train に、600秒毎に保存されます。
精度はこんな具合。
結構低いですね。。。
C:\>python cifar10_eval.py
2017-04-30 18:31:56.477270: precision @ 1 = 0.665
予測用の関数
評価用のcifar10_eval.pyがあるのでこれを改造します。
まず、eval_once()を変更します。
-def eval_once(saver, summary_writer, top_k_op, summary_op):
+def eval_once(saver, summary_writer, logits, summary_op, labels):
+  classes = ['airplane', 'automobile', 'bird', 'cat', 'deer', 'dog', 'frog', 'horse', 'ship', 'truck']

  with tf.Session() as sess:
    ckpt = tf.train.get_checkpoint_state(FLAGS.checkpoint_dir)
    if ckpt and ckpt.model_checkpoint_path:
      # Restores from checkpoint
      saver.restore(sess, ckpt.model_checkpoint_path)
      # Assuming model_checkpoint_path looks something like:
      #   /my-favorite-path/cifar10_train/model.ckpt-0,
      # extract global_step from it.
      global_step = ckpt.model_checkpoint_path.split('/')[-1].split('-')[-1]
    else:
      print('No checkpoint file found')
      return

    # Start the queue runners.
    coord = tf.train.Coordinator()
    try:
      threads = []
      for qr in tf.get_collection(tf.GraphKeys.QUEUE_RUNNERS):
        threads.extend(qr.create_threads(sess, coord=coord, daemon=True,
                                         start=True))

-      num_iter = int(math.ceil(FLAGS.num_examples / FLAGS.batch_size))
-      true_count = 0  # Counts the number of correct predictions.
-      total_sample_count = num_iter * FLAGS.batch_size
-      step = 0
-      while step < num_iter and not coord.should_stop():
-        predictions = sess.run([top_k_op])
-        true_count += np.sum(predictions)
-        step += 1

+      _summary_op, prediction, correct = sess.run([summary_op, logits, labels])
+      num = 3
+      for i in range(num):
+        value = sess.run(tf.argmax(prediction[i], 0))
+        print("image: {0}/{1}".format((i+1), num))
+        print('Correct:   ', classes[correct[i]])
+        print('Prediction:', classes[value])
+        print(prediction[i], "\n")

      # Compute precision @ 1.
-      precision = true_count / total_sample_count
-      print('%s: precision @ 1 = %.3f' % (datetime.now(), precision))

      summary = tf.Summary()
-      summary.ParseFromString(sess.run(summary_op))
+      summary.ParseFromString(_summary_op)
-      summary.value.add(tag='Precision @ 1', simple_value=precision)
      summary_writer.add_summary(summary, global_step)
    except Exception as e:  # pylint: disable=broad-except
      coord.request_stop(e)

    coord.request_stop()
    coord.join(threads, stop_grace_period_secs=10)
まず、top_k_opをlogitsに変更し、ラベルを受け取れるようにしたいので引数を増やします。
結果をわかりやすくするため、CIFAR-10では、0~9の数値にクラス名が割り振られているので、以下の順でリストを用意します。
['airplane', 'automobile', 'bird', 'cat', 'deer', 'dog', 'frog', 'horse', 'ship', 'truck']
ラベルの値が[3]であれば、クラス名は[cat]になります。
今回入力する画像は、既にラベル付けされているテストデータを使います。
ただし、テストデータは画像とラベルがバイナリで固められているので、どの画像が入力されたかは簡単にはわかりません。
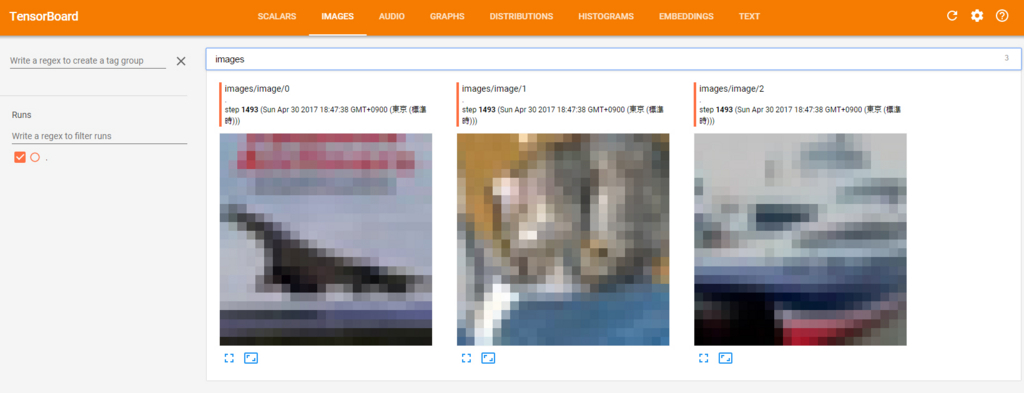
念のため、取り出した画像とラベルが正しい組み合わせか確認したいので、ログを書き出して、TensorBoardで表示してみます。
とはいっても、既存のコードに書き出し部分が記述されているのでそのままでもTensorBoardで確認できます。
ただし、このままでは入力される画像と、TensorBoardで確認できる画像がズレてしまうので、sess.run()にsummary_opも一緒に渡してやります。
この一緒にっていうのがミソです。
とりあえず今回は、3つの画像で予測を行います。
画像を増やしたい場合は、ループの回数と、ログの出力部分を変更してやります。
ログの出力は、cifar10_input.py の _generate_image_and_label_batch() にある、tf.summary.image('images', images)で行われています。
10枚ならtf.summary.image('images', images, max_outputs=10)といった感じに変更します。(ただの確認なので修正しなくても影響はありません)
で、呼び出し側の evaluate() の方です。
def evaluate():
  """Eval CIFAR-10 for a number of steps."""
  with tf.Graph().as_default() as g:
    # Get images and labels for CIFAR-10.
    eval_data = FLAGS.eval_data == 'test'
    images, labels = cifar10.inputs(eval_data=eval_data)

    # Build a Graph that computes the logits predictions from the
    # inference model.
    logits = cifar10.inference(images)

    # Calculate predictions.
-    top_k_op = tf.nn.in_top_k(logits, labels, 1)

    # Restore the moving average version of the learned variables for eval.
    variable_averages = tf.train.ExponentialMovingAverage(
        cifar10.MOVING_AVERAGE_DECAY)
    variables_to_restore = variable_averages.variables_to_restore()
    saver = tf.train.Saver(variables_to_restore)

    # Build the summary operation based on the TF collection of Summaries.
    summary_op = tf.summary.merge_all()

    summary_writer = tf.summary.FileWriter(FLAGS.eval_dir, g)

+    eval_once(saver, summary_writer, logits, summary_op, labels)
-    while True:
-      eval_once(saver, summary_writer, top_k_op, summary_op)
-      if FLAGS.run_once:
-        break
-      time.sleep(FLAGS.eval_interval_secs)
こんな感じです。
余計なのを消して、1回だけ呼び出すようにします。
テストデータで予測してみる
C:\>python cifar10_eval.py
image: 1/3
Correct:    airplane
Prediction: airplane
[ 3.62620592  1.53768694  1.48563719 -1.0087955  -1.08129168 -2.64975023
 -1.27237046 -2.95979309  3.30913401 -0.78325409]

image: 2/3
Correct:    cat
Prediction: cat
[-1.12269092 -1.88968229  0.24695219  3.0334115  -0.24946031  2.12394643
  0.70795071 -0.63257164 -0.17022569 -1.98787034]

image: 3/3
Correct:    ship
Prediction: ship
[ 2.59685659  4.38015366 -1.17230809 -1.95569634 -2.00066233 -3.12228751
 -2.66573024 -2.98842955  4.54536724  2.56416297]
100%の正答率。
念のため、TensorBoardで入力画像の確認。
C:\>tensorboard --logdir=/tmp/cifar10_eval
Starting TensorBoard b'52' at http://localhost:6006
(Press CTRL+C to quit)
 2枚目が猫かどうか怪しいですが、たぶん猫です。
[飛行機、猫、船]と、入力画像も正しいので、ばっちり当たっています。
自前の画像で予測してみる
今度は自前の画像を使ってみます。
evaluate() の画像の入力部分で、tf.read_file() で読み込んで、tf.image.decode_jpeg() で変換してやります。
こんな感じです。
def evaluate():
  with tf.Graph().as_default() as g:
    f = tf.read_file('./input.jpg')
    image = tf.image.decode_jpeg(f, channels=3)
    image = tf.image.resize_images(image, (24, 24))

    tf.summary.image('images', [image])
    logits = cifar10.inference([image])

    variable_averages = tf.train.ExponentialMovingAverage(cifar10.MOVING_AVERAGE_DECAY)
    variables_to_restore = variable_averages.variables_to_restore()
    saver = tf.train.Saver(variables_to_restore)

    summary_op = tf.summary.merge_all()

    summary_writer = tf.summary.FileWriter(FLAGS.eval_dir, g)

    eval_once(saver, summary_writer, logits, summary_op)
今回はcifar10_input.pyを使わないので、ログに画像が書き出されませんので、tf.summary.image('images', [image])でログに書き出します。
なくてもいいです。
ラベルのデータはないので、eval_once() から、labelsの記述を削除します。
するとこんな感じ。
C:\>python cifar10_eval.py
image: 1/1
Prediction: cat
[-25.54330444 -24.77457619   9.08094788  27.7165451   14.62664127
   9.53357697  24.73740768 -15.22198772   2.13212824 -19.82105827]
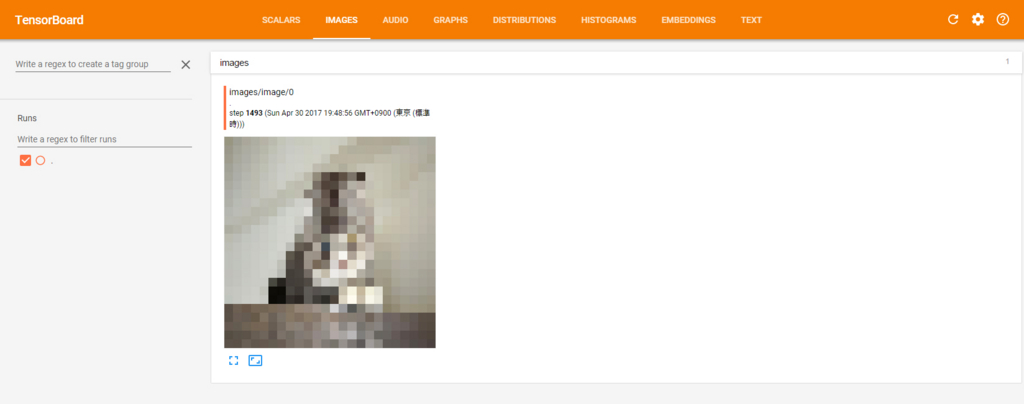
ちなみに入力画像はこちら。

Image by フリー素材ぱくたそ
トリミングもなしで、このままぶち込みます。
実際に入力される画像は、28x28なのでここまで低画質になりますが、正確に判断してくれています。
